So You Wanna Trick Out Your Profile
MARKDOWN TUTORIAL by Deana Barker (muincat)
These days, it seems just about every Swap-Bot Forum I go into, someone has a question about how to change their profile, whether it be to add a badge, picture, link or whatever. Usually, the person doesn’t know a thing about Markdown language and is asking for help. I never ran across Markdown until I became a member of Swap Bot and it frustrated me at first, too. I followed the link provided by Swap-Bot to Daring Fireball: Markdown Basics, but still found it difficult to work out what to do without specific examples pertinent to Swap-Bot, so that’s what I’m going to try to do for you all here in this post. With any luck, we’ll have you off into the land of customizing bliss in no time!
PICTURES & BADGES:
This is the one I see the most questions on. “How can I add this badge/picture to my profile?”
Well, badges and pictures are really the same thing. First, you need to know the location of the image you want to use. It has to already be uploaded online somewhere since Swap-Bot does not have the capability of uploading graphics for profiles.
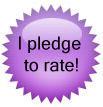
Let’s say I want to post the “I Pledge To Rate” badge created by pgk:

This badge is located on the Swap-bot server at: http://static.swap-bot.com/purplebadge.jpg – In the case of most badges, however, the image location information will be provided for you by whomever created the badge. The graphics may be located on Photobucket, or Flickr, or on someone’s personal website. The location will always need to be an internet URL address – not a link to your personal computer.
Next, you’ll go into “Edit Profile” and decide where you want this badge to show up on your profile. When you find the spot, click on it, so that your cursor is in that spot, ready to type.
What you type to make the image appear on your profile page (the reason you’re all reading this!):

If you want to get fancy and add a description for folks who might not be able to load graphics for whatever reason, you would type something like this:

Lets say you want “alt text” to read “I pledge to rate.” It would look like this:

———-
You add other types of photos and pictures exactly the same way! How cool is that?! Let’s pretend you’ve got this really cute animated clip art you want on your profile, like this little kitty:

You would need to have him available somewhere online, like Flikr, Photobucket or your own personal website. I uploaded this little guy to my web server so I could show you how to do it. He is located at http://www.muincat.com/images/DancinCat.gif, so I would would find the place in my profile where I wanted to put him and type:

OR

———-
MAKING HYPERLINKS:
Great news! Hyperlinks are made the same way! The only difference is that you’re linking to a website instead of a picture file. Going back to the “I Pledge to Rate” example, you could put a link under the page that goes to the webpage that explains exactly what it is that you pledged like this:
To make a link you type the words you would like hyperlinked in brackets, followed by the URL in parenthesis:
[What I Pledged](http://www.swap-bot.com/forums/topic/7681)
The whole thing with the graphic and link would look like this:
**</p>
[What I Pledged](http://www.swap-bot.com/forums/topic/7681) </b>
If you want to only post the graphic and make it a link, your code would look like this:
[
Another example would be if you wanted to make a link to your Amazon Wish List. Find the place in your profile that you’d like to add the link. You’d like it to say This is my Amazon Wishlist . Type:
[This is my Amazon Wish List](http://www.amazon.com/gp/registry/wishlist/1QLOE6JUSKNJ2)
Just make sure you type YOUR wish list URL and not the one above, since its mine. But then again, if you’d like the whole world to send me gifts from Amazon, I’m fine with that! 😉
———
OTHER FORMATTING:
OK, pictures and links are the two biggest things that everyone wants to do. There are, however, a few other things that can make things look nice.
If you’d like to make a
Big Headline
(Heading 1), just type equal signs under it like so:
Big Headline
==========
If you’d like a
Smaller Headline
(Heading 2), like for a subcategory, just type dashes on the line under it like so:
Smaller Headline
————————
The next level down is considered
Heading 3
and would be typed with 3 pound signs before it like this:
###Heading 3
Bulleted lists are probably the easiest thing of all to make. All you have to do is put an asterisk before each item in the list and it will make it for you:
-
Item 1
-
Item 2
-
Item 3
Gives you:
- Item 1
- Item 2
- Item 3
If you want a numbered list, just do the same as above, but use a number with a period after it:
-
Item
-
Another Item
Gives You:
- Item
- Another Item
If you’d like to make something show up in italics on your profile, all you have to do is add an asterisk on either side of the word or phrase you’d like emphasized. If you want something written in bold, use TWO asterisks on both sides of the word or phrase.
———-
Last, but not least, the “Preview” button is your friend! If you’re not sure that you typed something correctly, just hit the preview button and you’ll be able to check your work. Also, you can go to the code generator at Daring Fireball to do a trial run. The first box is where you type what you want to try. Below the box, you’ll find two drop down menus. Leave the first one (“Filter”) set to “Markdown” and the “Results” drop down should be set to “Preview.” Click “Convert” and the next box shows you what it will really look like to the rest of the world.
Good Luck!
———-
Thank you to Deana for such a detailed and helpful tutorial! We (Travis & Rachel) chose to allow Markdown (as opposed to HTML) on Swap-bot for formatting because it helps keep the site safe from HTML code which could cause problems. Markdown is also meant to be a simpler language that is easier to learn. You can use any of the formatting options discussed above on your profile page, within swap descriptions, and within the Swap-bot Forums. There is more helpful information about using Markdown on the Swap-bot Wiki. Have fun!


